nv.design Interface
In the nv.design module, well design entities are called projects and cases.
A project acts as a folder containing multiple cases, with each case representing a single design version (scenario). A project can consist of up to 10 cases.
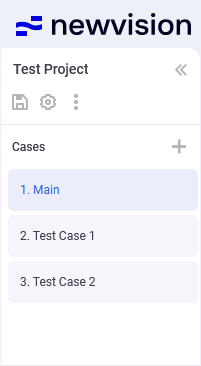
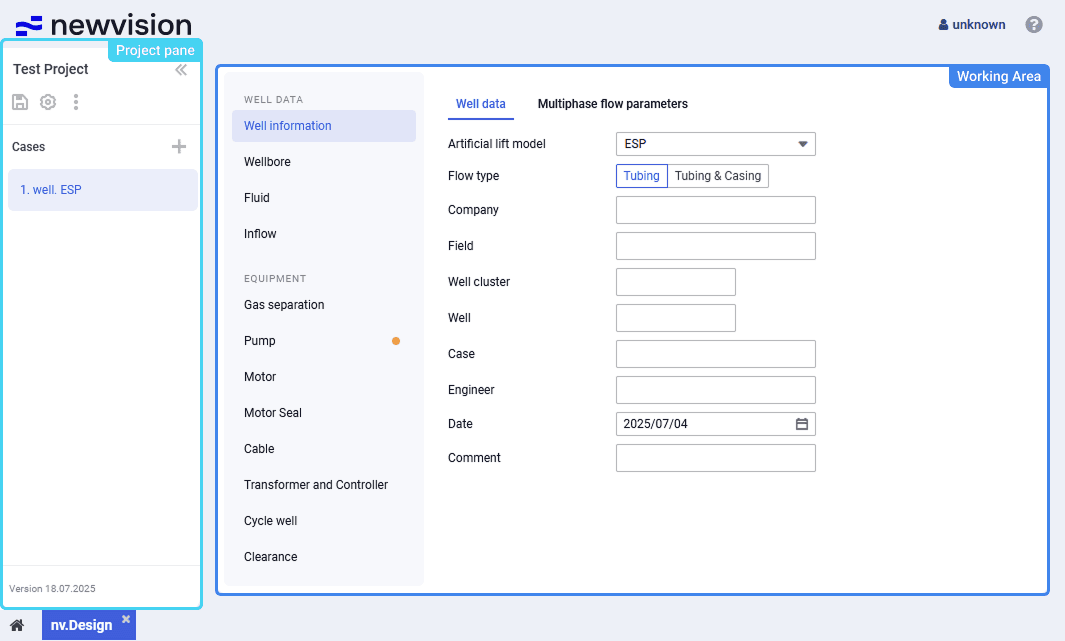
The nv.design module interface consists of the following parts:
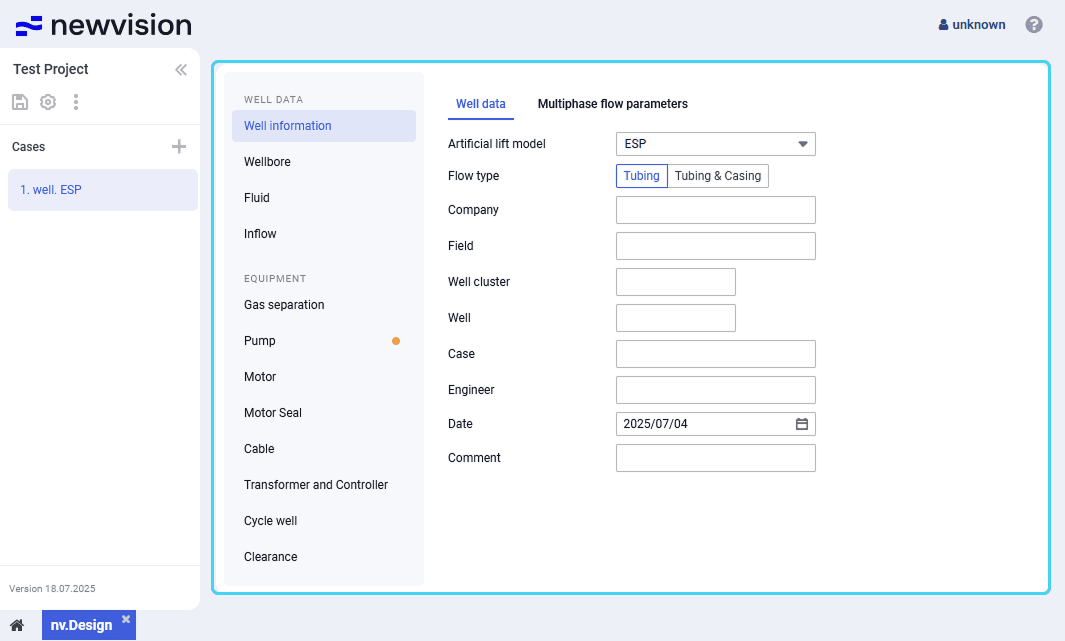
- Project pane in the left part of the module.
For details on creating, importing, and opening projects, see . - Working area in the central part of the module.
Project Pane
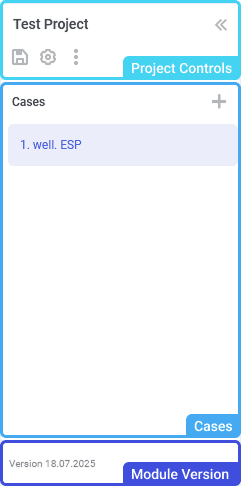
The project pane in the left part of the module provides controls for managing projects and cases. It consists of the following parts:
- Project controls at the top.
- Cases area in the center.
- Module version at the bottom.
You can collapse the pane to a smaller size by clicking the double arrow icon ( ) in its upper-right corner.

Project Controls
At the top of the project pane, the name of the currently open project is displayed. By clicking it, the Projects window opens. In this window, you can see the status of the current project, and manage all projects that were added to the module. For details, see .
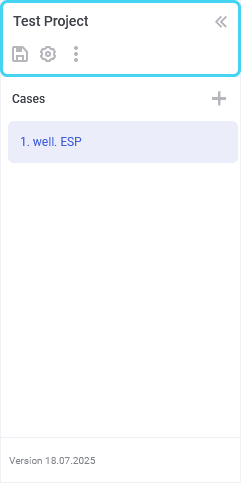
Below the current project name, the following controls for managing the project are located:
Save ( )

Saves changes made to the current project.
 | Important |
Units ( )

Opens the window for configuring measurement units for the project. For details, see .
Action menu ( )

Provides access to the following project controls:
Duplicate ( ): Creates a copy of the current project.
The created copy appears in the project catalog. For details, see .
Download ( ): Exports the project to a file in the JSON format.

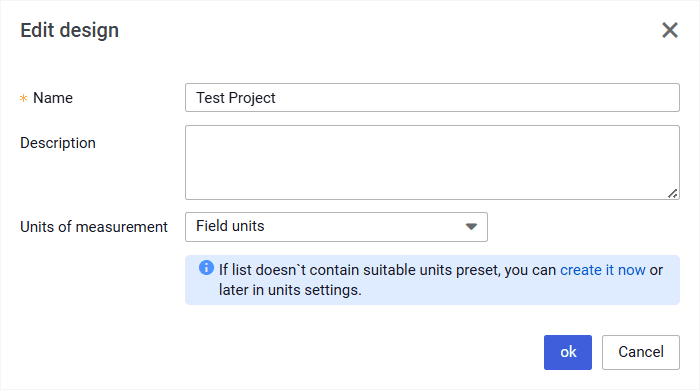
Update ( ): Provides the ability to edit the name, description, and/or measurement unit system of the project in the window that appears.

Delete ( ): Deletes the project.

Cases
The pane contains a list of the cases created in the project and controls for managing them.
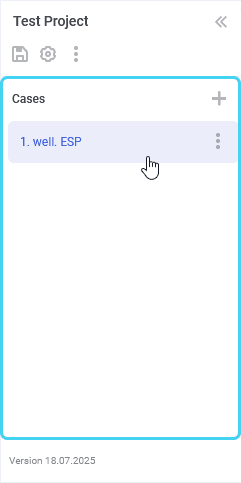
To open a case, click its name in the list.
To add a case, in the upper-right corner of the pane, click Add ( ) and select the desired option: Create ( ) or Load ( ). For details, see .


On hovering over a case in the list, in the right part of the corresponding row, the three dots icon ( ) appears. It provides access to the action menu with the following options:
Duplicate ( ): Creates a copy of the current case.
The created copy appears in the list.Download ( ): Exports the case to a file in the JSON format.
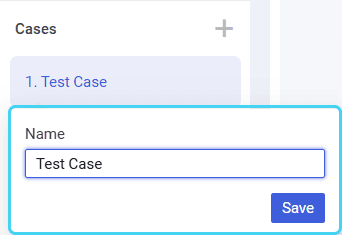
Rename ( ): Provides the ability to edit the name of the case in the window that appears.
Delete ( ): Deletes the case.
| Important |
Module Version
The current module version is displayed at the bottom of the project pane.
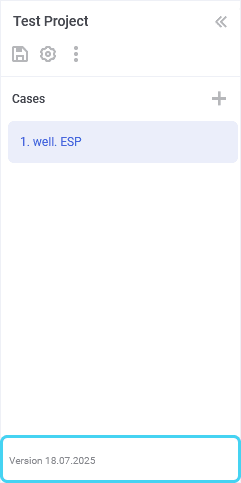
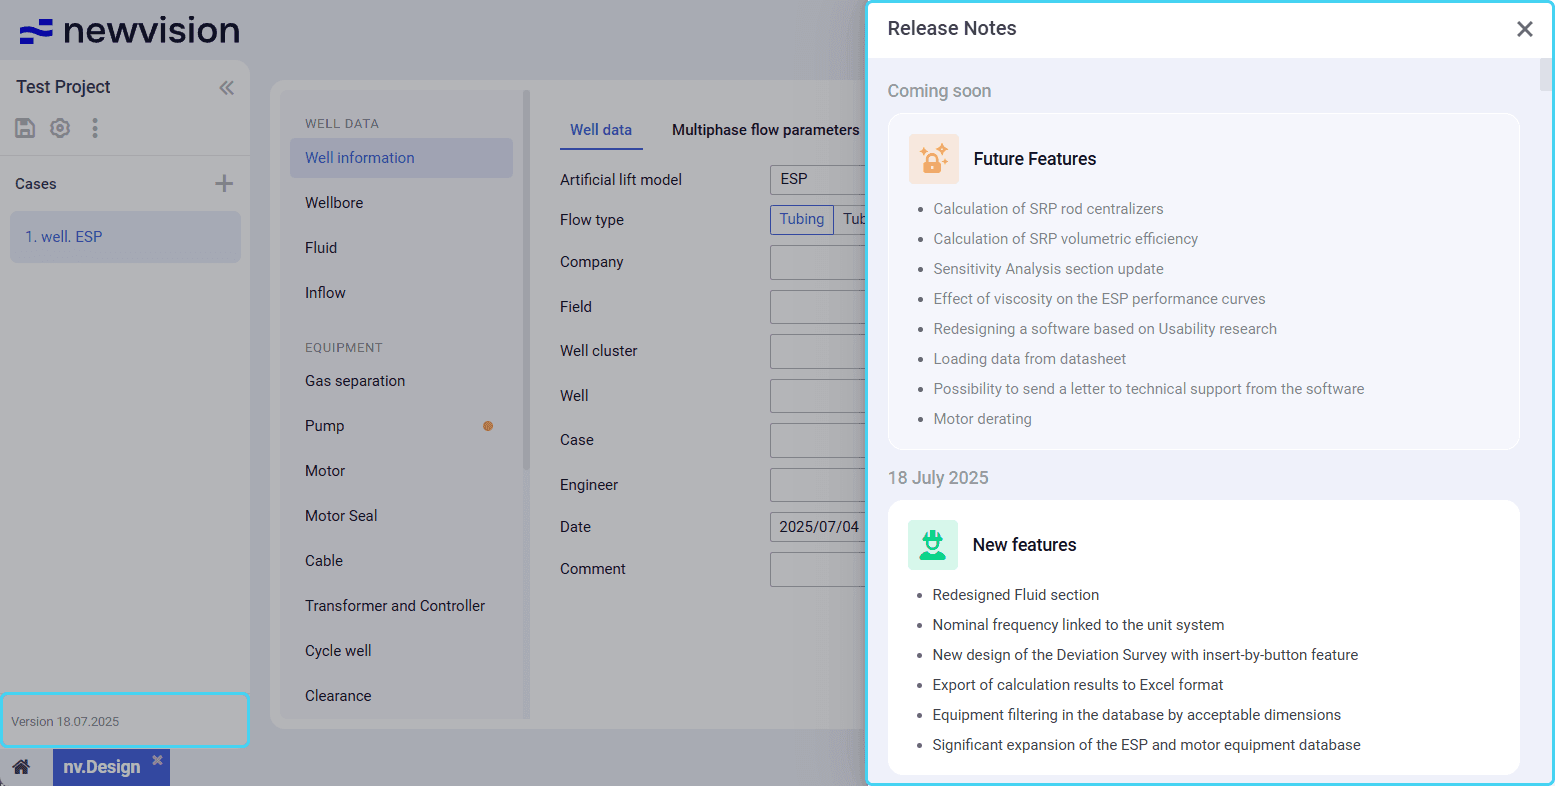
By clicking it, you can open the Release Notes window with information about the past and future releases. For details, see .
Project Catalog
The Projects window provides access to all projects existing in the nv.design module.
The window is divided in two parts:
- Current project data in the upper part of the window.
- All Projects area in the central part of the window.
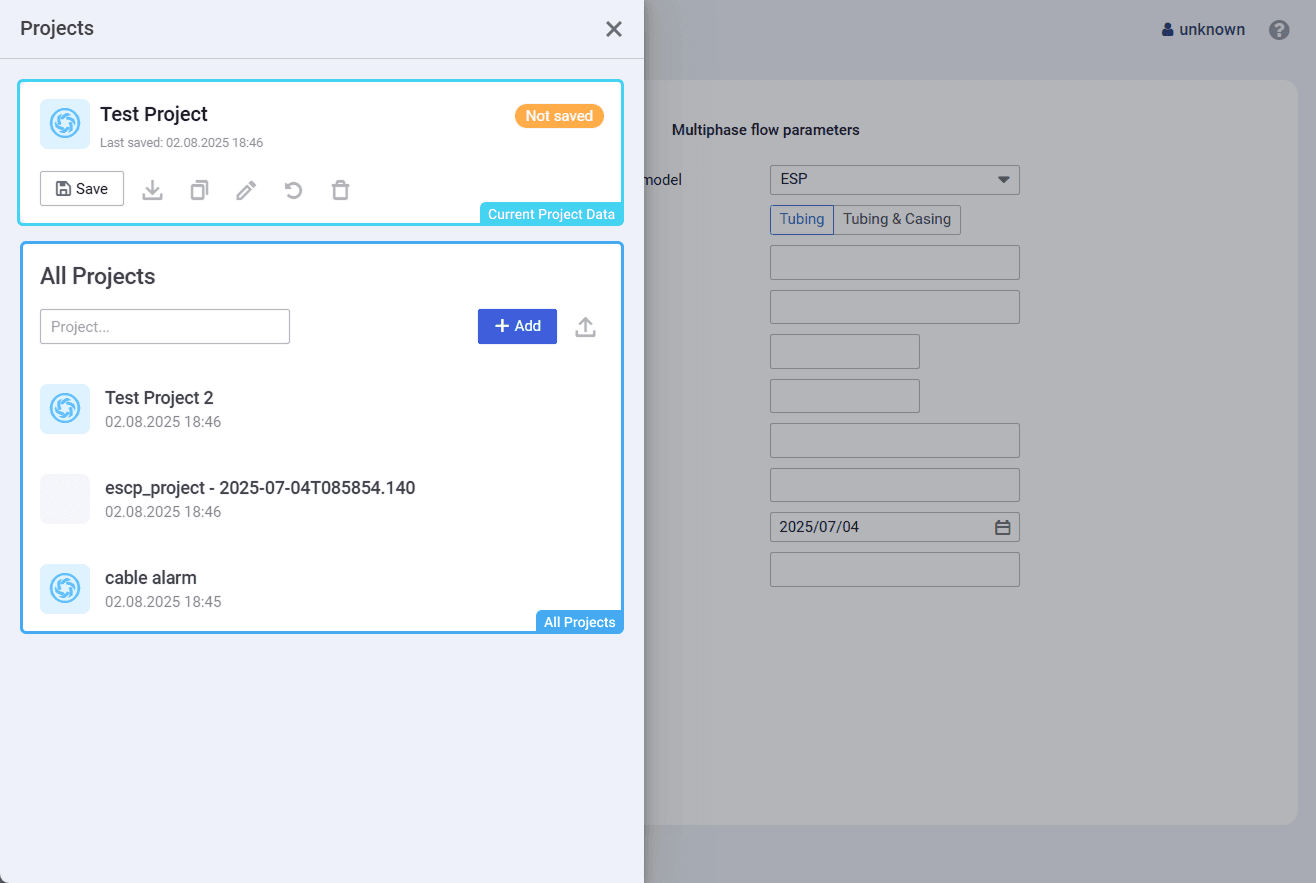
Current Project Data
The area provides information and controls for managing the project that is opened at the moment.
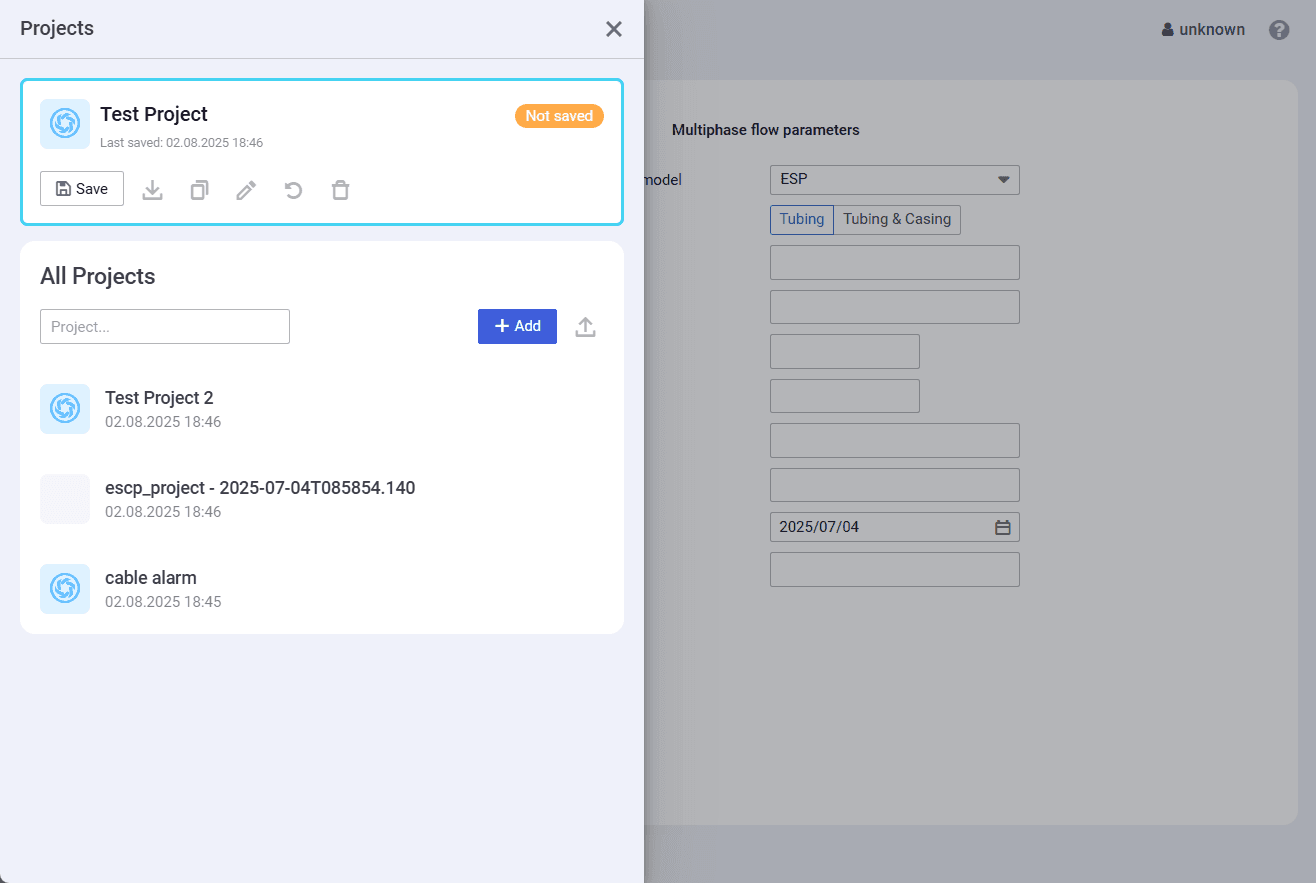
At the top of the area, the name of the current project is displayed, along with the date and time of the last project save. On the right, the status of project changes is shown: Saved or Not saved.
Below, the following controls are available:
Save ( )
Saves the changes made to the project.
After saving, the project status changes to Saved.
Download ( )
Provides the ability to export the project to a file in the JSON format.
For details on importing projects, see .
Duplicate ( )
Creates a copy of the current project.
The created copy appears in the list in the All projects pane.
Update ( )
Provides the ability to edit the name, description, and/or measurement unit system of the project in the window that appears.
Reset unsaved changes ( )

Reverts the project to its state at the time of the last save. All unsaved changes are discarded.
Delete ( )
Deletes the project and all cases within it.
All Projects
The area contains a list of all projects existing in the module and provides controls for their managing.
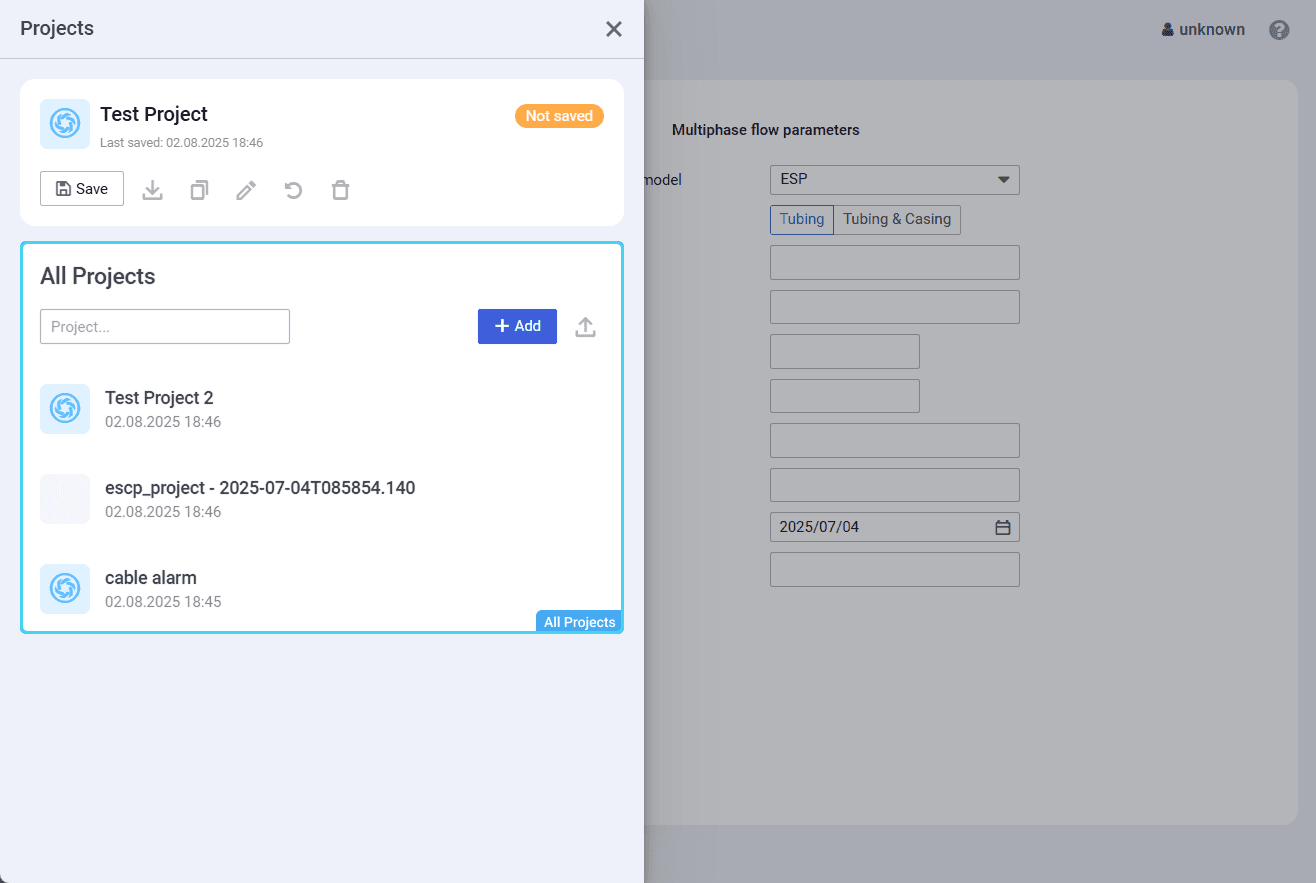
To open a project, click its name in the list.
You can search for a project by typing its name or a part of it in the search field at the top of the area.
In the upper-right corner of the area, the Add ( ) and Upload ( ) buttons are available. Using them, you can create a new or import an existing project in the JSON format. For details, see and .
On hovering over a project in the list, in the right part of the corresponding row, the three dots icon ( ) appears. It provides access to the action menu with the following options:
Duplicate ( ): Creates a copy of the current project.
The created copy appears in the list.Update ( ): Provides the ability to edit the name, description, and/or measurement unit system of the project in the window that appears.
Delete ( ): Deletes the project and all cases within it.
Working Area
The working area content depends on the section selected in its left part. For details on each of the sections, see .
Unit Selection
By default, in the nv.design module, two systems of measurement units are available:
- Field units (US oilfield units)
- SI units (metric units)
Measurement system is selected at the stage of project creation. For details, see and .
However, you can change the measurement system after a project is created in one of the following ways:
- Change other measurement units for specific parameters
- Select another measurement system for the entire project
- Configure a custom set of units
Changing Measurement Units for Specific Parameters
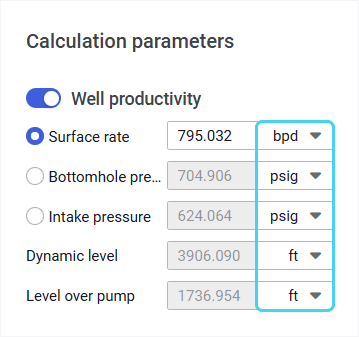
Most nv.design sections provide the ability to select another unit of measurement for specific parameters. For details on the module sections, see .
To change the measurement unit for a specific parameter, to the right of the field with the parameter value, click the current unit of measurement and select the desired option from the list.
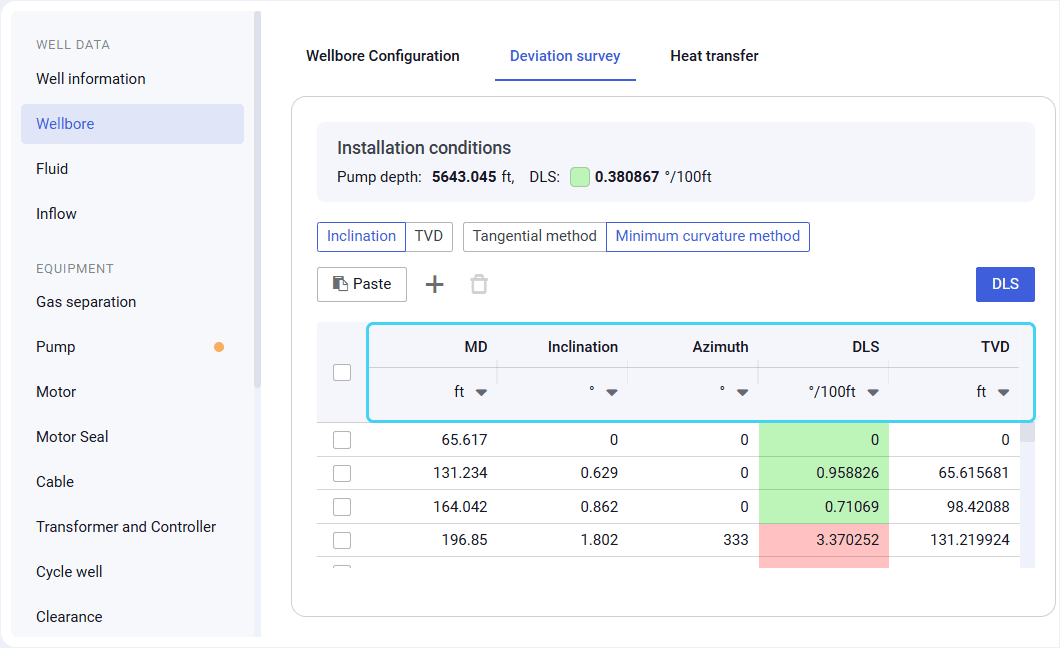
In some tables, units can be changed from the column header.
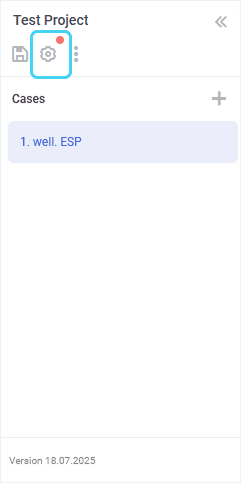
After you change units for at least one parameter, a red marker ( ) appears on the Units ( ) button in the upper-left corner of the module. It indicates that there are changes made to the measurement units.

If the unit change is permanent, it is recommended to save the modified measurement system as a custom set. For details, see .
Selecting Another Measurement System for Entire Project
After the project is created, you can change the measurement system selected at the creation stage.
To do this, open the desired project and perform the following actions:
In the upper-left corner of the nv.design module, click Units ( ).
The Unit system settings window opens in the right part of the module.
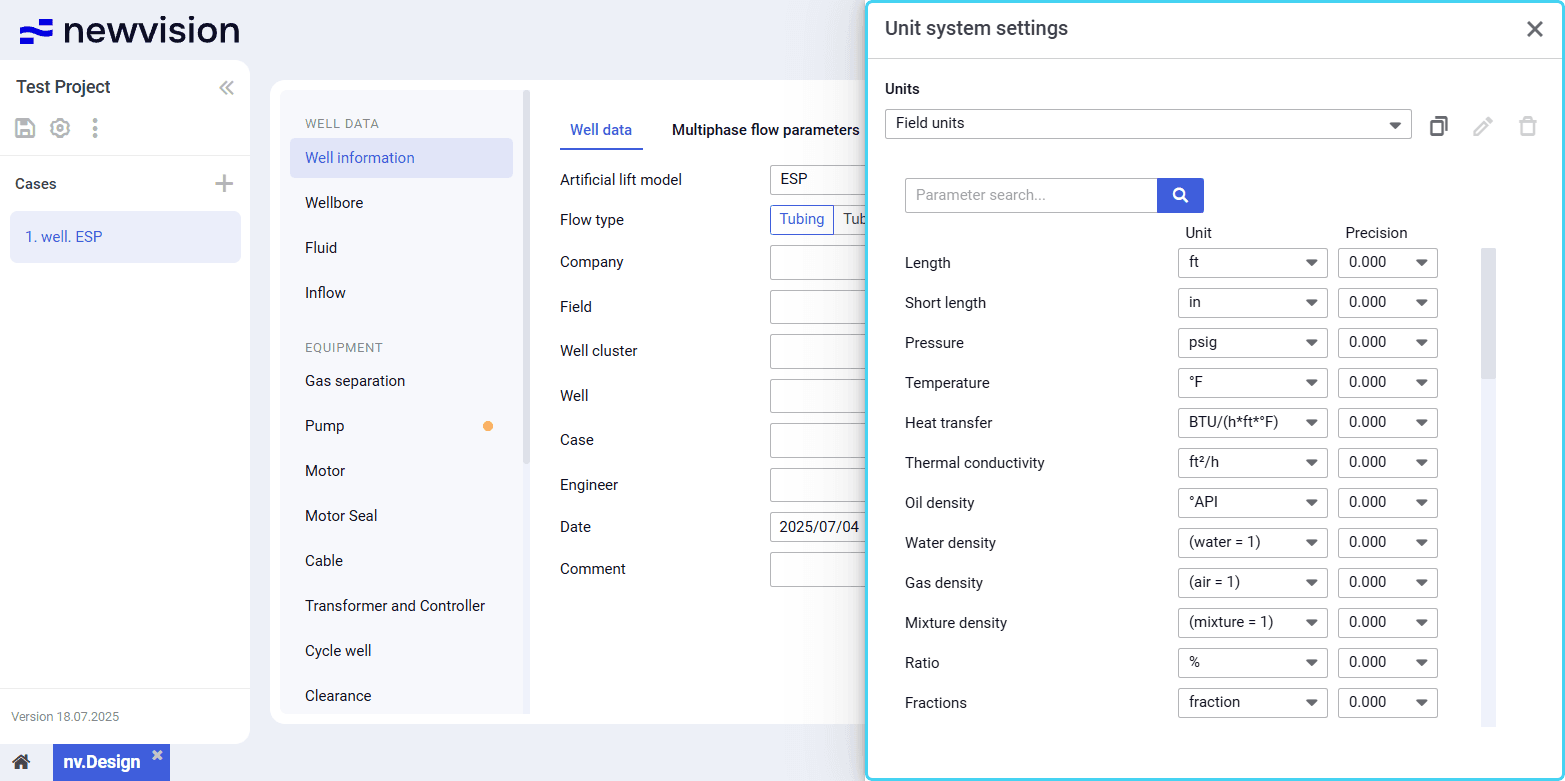
- At the top of the window, under the Units heading, select the desired measurement system from the list.
Close the window by clicking the cross icon ( ) in its upper-right corner.

Configuring Custom Set of Units
nv.design provides the ability to configure custom sets of measurement units. This feature is helpful when the well design requires using units from different measurement systems with different precision for various parameters.
You can create a custom set of units:
- Upon creating or importing a project
- While working on an existing project
Configuring Custom Set of Units on Project Creation or Import
To configure a custom set of units on creating or importing a new project, perform the following actions:
- In the New project window, click create it now under the list of available unit systems.
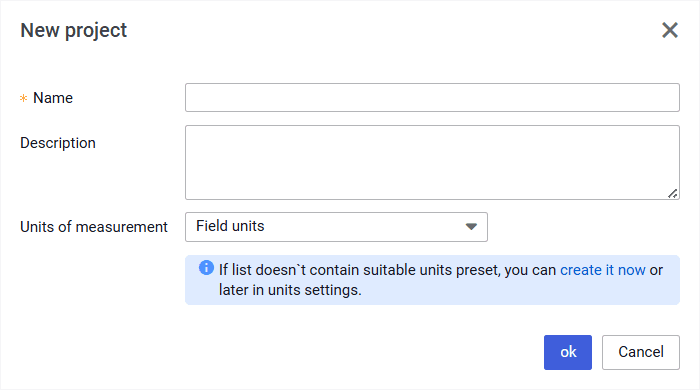
- The Unit system settings window opens in the left part of the module.
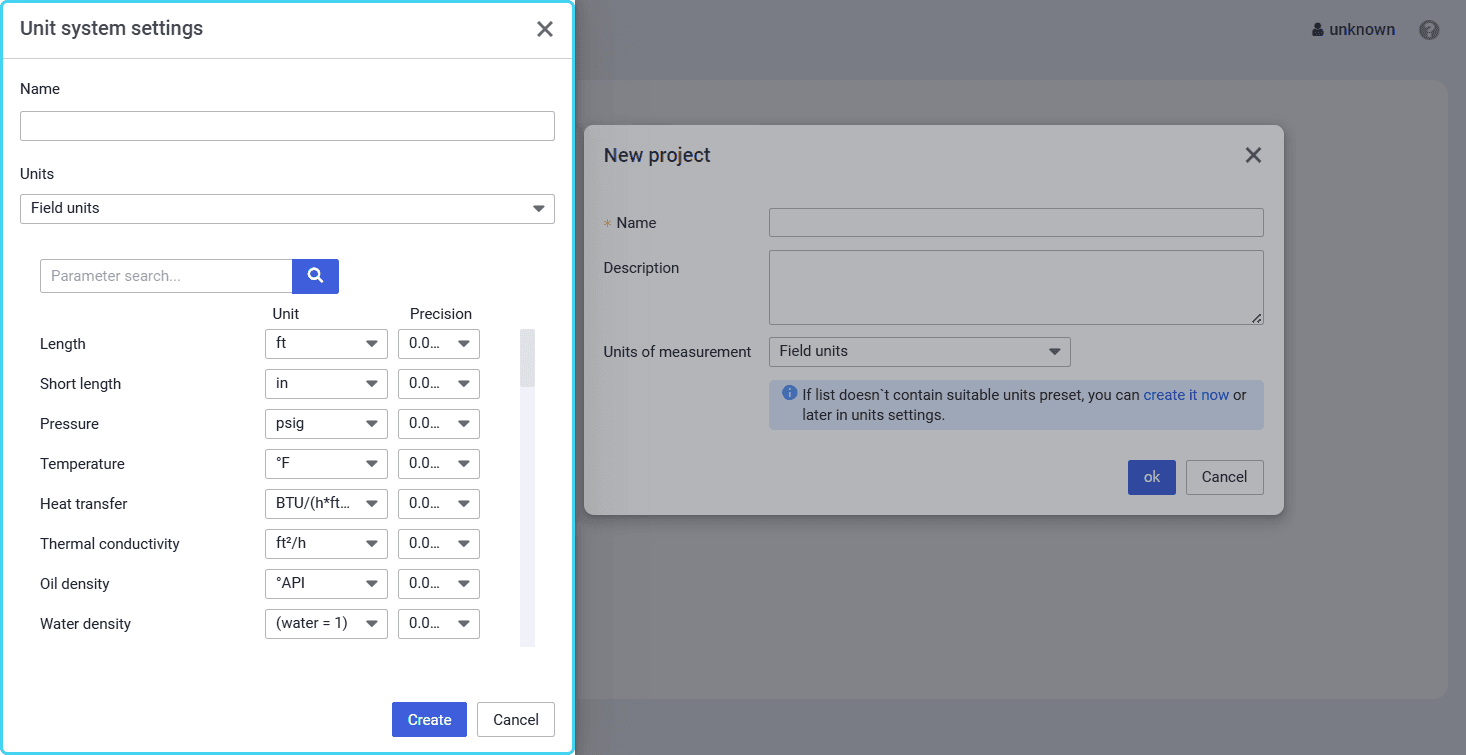
- In the Unit system settings window, perform the following actions:
- At the top of the window, in the Name field, enter the name for the new set of units.
- (Optional) From the Units list, select an existing unit system based on which you want to create a new one.
- (Optional) Search for the parameter for which you want to select another measurement unit or its precision level by entering the parameter name or its part in the Parameter search field.
- To the right of the desired parameter name, select the desired unit from the list in the Unit column.
- To specify precision with which the parameter value will be displayed, in the Precision column, select the desired number of decimal places from the list.
 | Note |
- At the bottom of the window, click Create.
The created set is automatically selected from the Units list.
| Note |
Configuring Custom Set of Units for Existing Project
To configure a custom set of units while working on a project, perform the following actions:
In the upper-left corner of the nv.design module, click Units ( ).
The Unit system settings window opens in the right part of the module.
| Note |
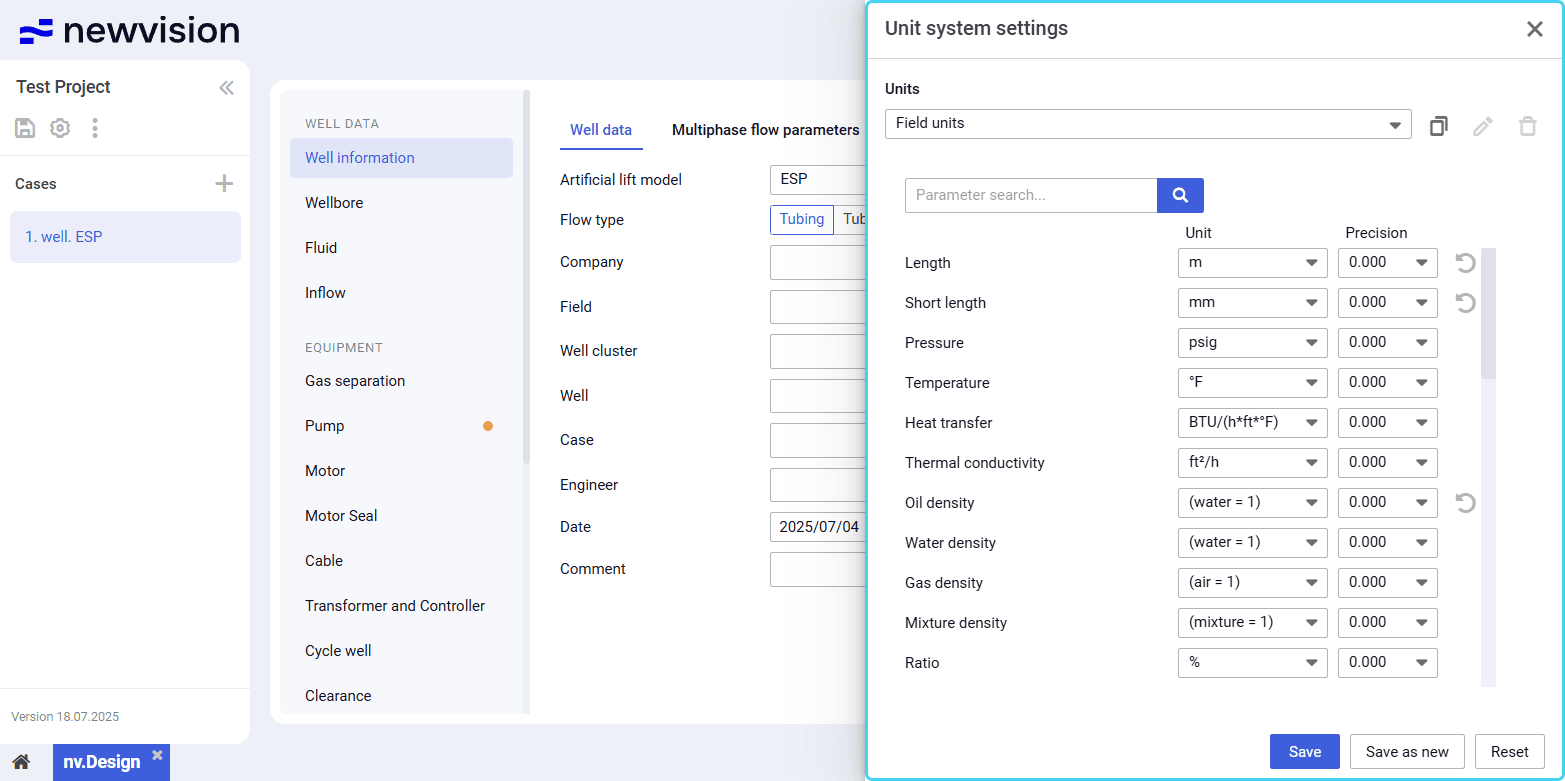
- (Optional) From the Units list, select an existing unit system based on which you want to create a new one.
| Note |
- (Optional) Search for the parameter for which you want to select another measurement unit or its precision level by entering the parameter name or its part in the Parameter search field.
- To the right of the desired parameter name, select a unit from the list in the Unit column.
- To specify precision with which the parameter value will be displayed, in the Precision column, select the desired number of decimal places from the list.
| Note |
- Depending on the measurement system selected at Step 2, at the bottom of the Unit system settings window, perform one of the following actions:
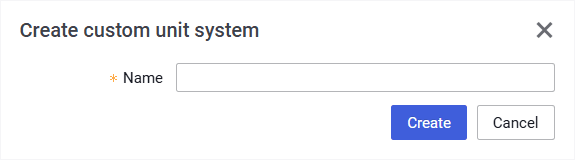
- (For default systems) Click Save as new, and then, in the window that appears, enter the name for the new set of units and click Create.
- (For custom sets)
- To save changes made to the set, click Save.
- To save changes as a new set, click Save as new, and then, in the window that appears, enter the name for the new set of units and click Create.
- The configured set is automatically selected from the Units list and can be further used in other projects.
- (Optional)
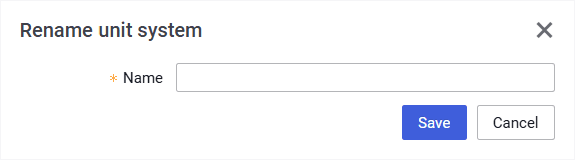
To rename a custom set, to the right of the Units list, click Edit ( ).
To delete a custom set, to the right of the Units list, click Delete ( ).

Release Notes
In the nv.design module, you can view release notes that provide insight into the latest updates and features expected in upcoming releases.
To open the Release Notes window, click the name of the current version in the lower-left corner of the module.
User guide
Software for Well and Downhole Equipment Modeling