
Working with chart templates
Working with chart templates: The trend chart provides the ability to save configurations of displayed parameters as templates for faster switching between different chart…
On this page
The trend chart provides the ability to save configurations of displayed parameters as templates for faster switching between different chart views.
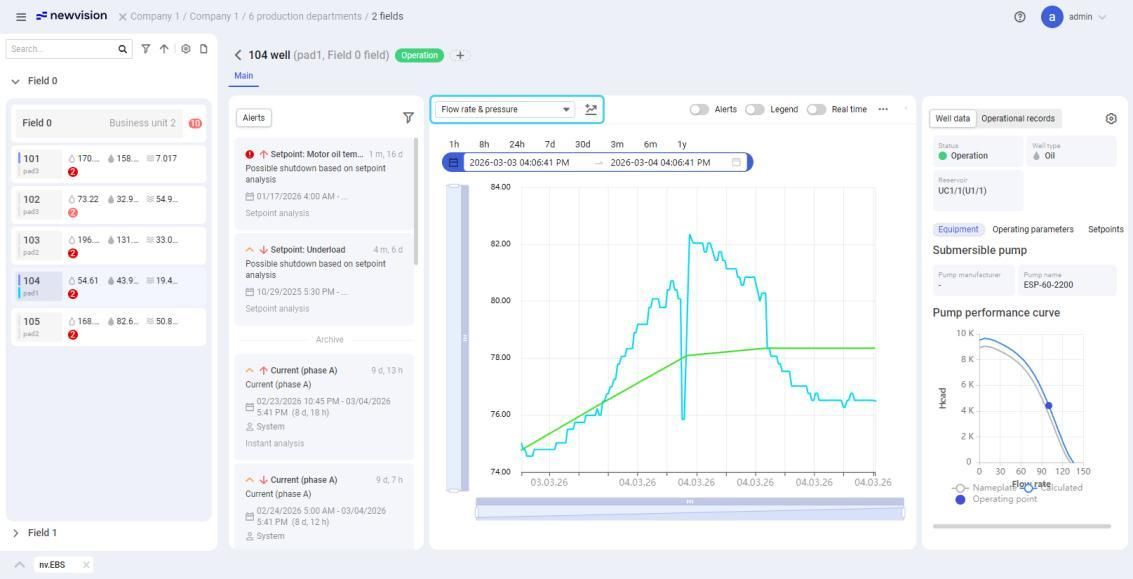
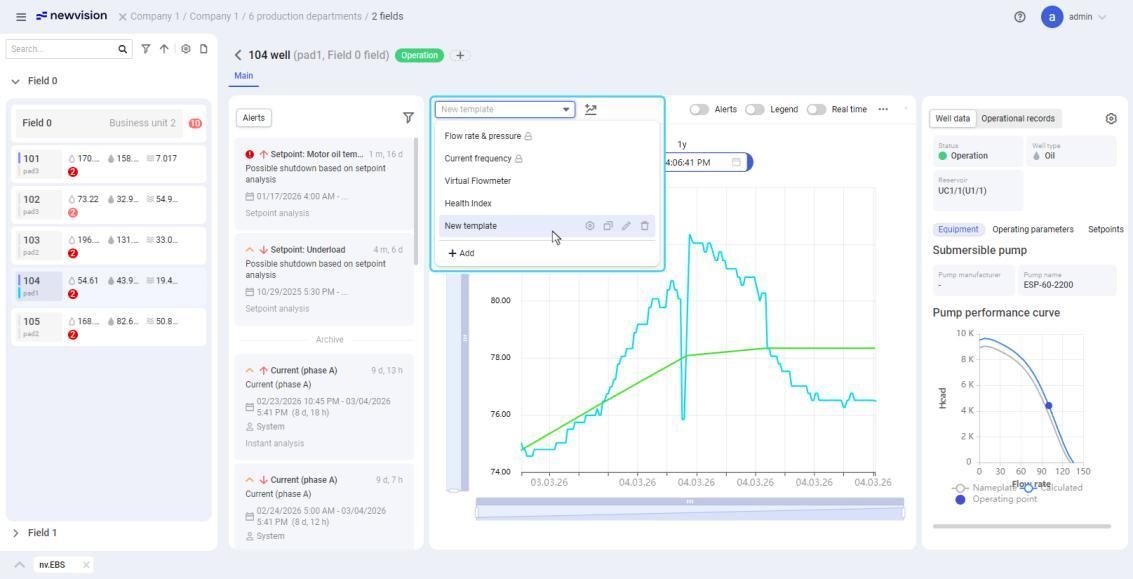
A list of all templates is available at the top of the trend chart. You can switch between them by selecting the desired template from the list.
 Select image to enlarge
Two default templates are available: Flow rate & pressure and Current frequency. They cannot be modified but you can create new templates based on them (see procedures below).
Important
Templates store only axis and parameter settings. Other display parameters, such as the date range and alert indications, are configured independently. You can perform the following actions with templates:
3.2.1.1. Creating Templates#
You can create a trend chart template in the following ways:
Creating Template From Scratch#
To create a template from scratch, perform the following actions:
-
Open the well data window for the desired well. For details, see Well Data Window.
-
In the central part of the window, click the name of the currently selected template at the top of the trend chart, and then, from the drop-down list, select Add (
 ).
). -
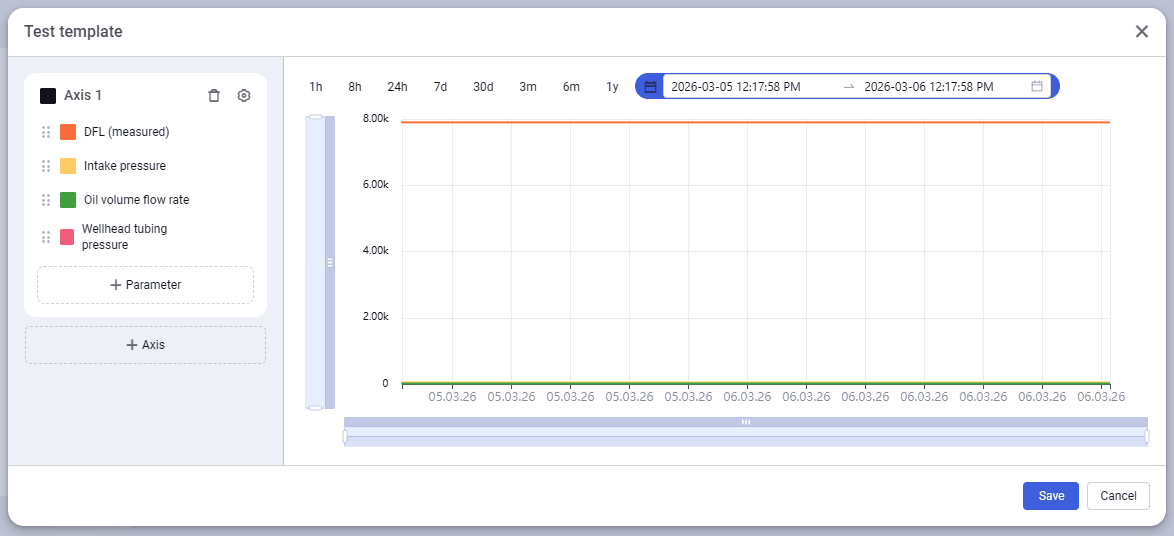
In the window that opens, enter a name for the new template and click Create. A new template settings window opens.
 Select image to enlarge
 -
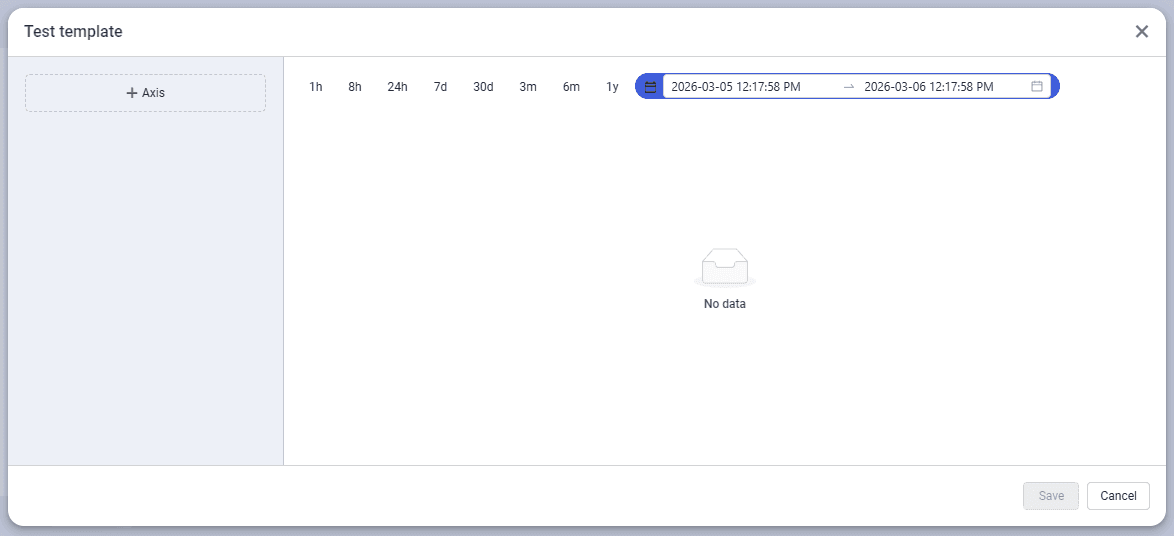
In the left part of the window, click Axis (
). A new axis tile appears. -
(Optional) To configure the new axis settings, you can perform the following actions:
-
To change the color of the labels displayed on the axis, click the square to the left of the axis name, and then, in the window that appears, select the desired color and its opacity using sliders or manual input.
-
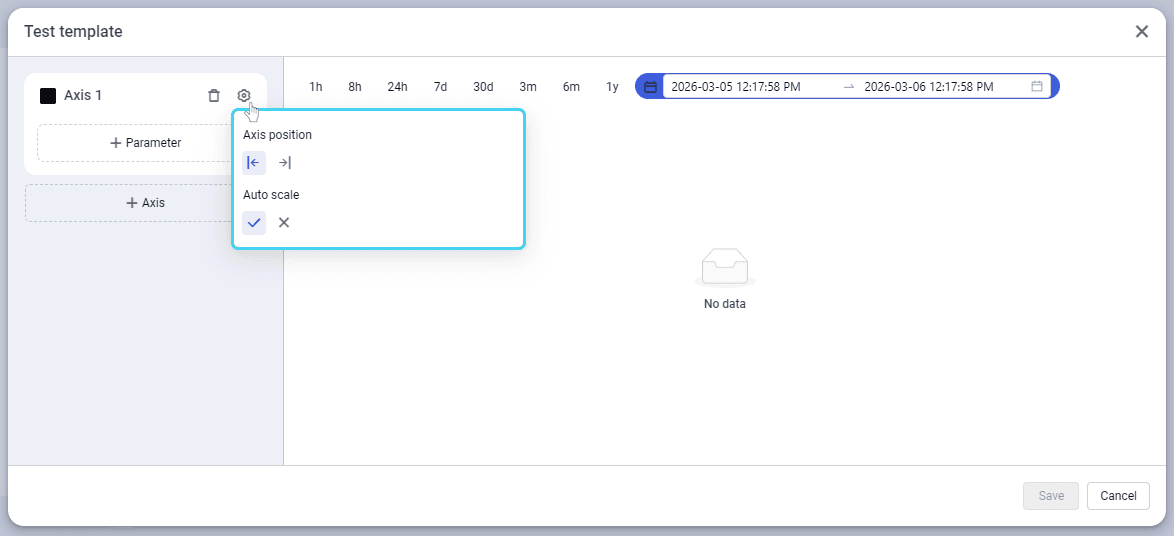
To change the axis position and/or scale, in the upper-right corner of the tile, click Settings (
 ), and then, in the window that appears, select the desired options under the Axis position and Auto scale headings.
 Select image to enlarge
-
-
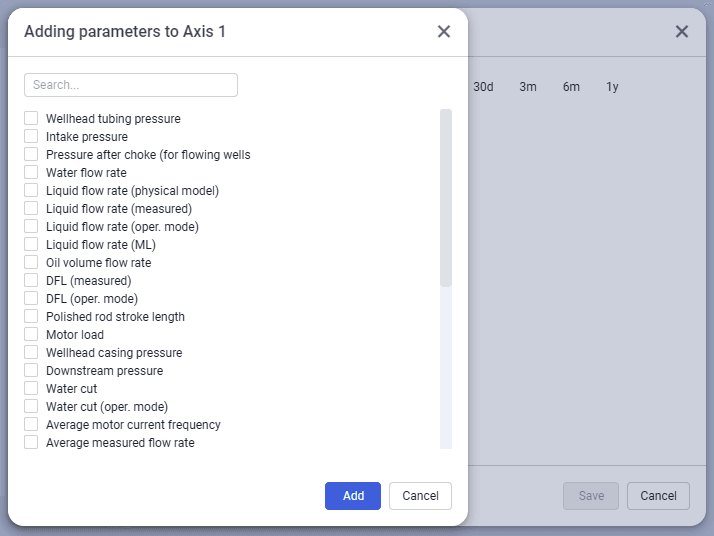
In the new axis tile, click Parameter (
). A window with a list of parameters opens. Select image to enlarge
 -
In the list, select check boxes of the parameters that will be displayed in the trend chart, and then, at the bottom of the window, click Add. A list of selected parameters appears on the axis tile.
 Select image to enlarge
 -
(Optional) To configure the selected parameter settings, you can perform the following actions:
-
To change the parameter color, click the square to the left of the parameter name, and then, in the window that appears, select the desired color and its opacity using sliders or manual input.
-
To change the parameter graph type and/or marker, hover over the row of the parameter, click Settings (
), and then, in the window that appears, select the desired options under the Visualization and Marker headings.
-
-
(Optional) To add more axes or more parameters to an existing axis, repeat the previous steps.
-
(Optional) To delete a parameter or axis, click Delete (
 ) on the axis tile or in the parameter row.
 -
In the lower-right corner of the window, click Save. The created template is applied to the trend chart automatically.
Duplicating Templates#
To create a new template by duplicating an existing one, perform the following actions:
-
Open the well data window for the desired well. For details, see Well Data Window.
-
In the central part of the window, click the name of the currently selected template at the top of the trend chart. A drop-down list of all templates appears.
-
In the list, hover over the desired template and click the Duplicate (
 ) button that appears to the right of the template name.
 Select image to enlarge
Important
Default templates (Flow rate & pressure and Current frequency) cannot be duplicated. To create a new template based on them, see the procedure below.
-
In the window that opens, enter a name for the new template and click Create. The created template is applied to the trend chart automatically.
-
Make the desired changes to the new template. For details, see the procedure above.
-
At the top of the chart, click Save (
 ), and then select Save from the drop-down list.
Saving Existing Template As New#
After modifying an existing template, you can save it as a new template. To do this, perform the following actions:
-
Open the well data window for the desired well. For details, see Well Data Window.
-
In the central part of the window, click the name of the currently selected template at the top of the trend chart, and then, from the drop-down list, select the template that you want to modify. The selected template is applied to the trend chart automatically.
-
Make the desired changes to the template. For details, see the procedure above.
-
At the top of the chart, click Save (
), and then select Save as new from the drop- down list.
3.2.1.2. Editing Templates#
You can edit a trend chart template in the following ways:
Renaming Templates#
To rename a template, perform the following actions:
-
Open the well data window for the desired well. For details, see Well Data Window.
-
In the central part of the window, click the name of the currently selected template at the top of the trend chart, then hover over the desired template and click Rename (
 ) to the right of the template name.Select image to enlarge
Important
Default templates (Flow rate & pressure and Current frequency) cannot be renamed. A window displaying the template name opens.
-
Enter a new name for the template and click Edit.
Modifying Chart Axes#
To modify the chart axes or parameters displayed on them, perform the following actions:
-
Open the well data window for the desired well. For details, see Well Data Window.
-
In the central part of the window, click the name of the currently selected template at the top of the trend chart, then hover over the desired template and click Edit (
) to the right of the template name.Important
Default templates (Flow rate & pressure and Current frequency) cannot be edited.
The template settings window opens.
Select image to enlarge -
In this window, perform the desired actions:
-
To add a new axis, in the left part of the window, click Axis (
). The new axis tile appears. -
To configure the axis settings, perform the desired actions:
-
To change the color of the labels displayed on the axis, click the square to the left of the axis name, and then, in the window that appears, select the desired color and its opacity using sliders or manual input.
-
To change the axis position and/or scale, in the upper-right corner of the tile, click Settings (
), and then, in the window that appears, select the desired options under the Axis position and Auto scale headings.
-
-
To add a parameter to the axis, perform the following actions:
-
In the axis tile, click Parameter (
). A window with a list of parameters opens.Select image to enlarge -
In the list, select check boxes of the parameters that will be displayed in the trend chart, and then, at the bottom of the window, click Add. A list of selected parameters appears on the axis tile.
-
-
To configure parameter settings, perform the desired actions:
-
To change the parameter color, click the square to the left of the parameter name, and then, in the window that appears, select the desired color and its opacity using sliders or manual input.
-
To change the parameter graph type and/or marker, hover over the row of the parameter, click Settings (
), and then, in the window that appears, select the desired options under the Visualization and Marker headings.
-
-
To delete a parameter or axis, click Delete (
) on the axis tile or in the parameter row.
-
-
In the lower-right corner of the window, click Save. The updated template is applied to the trend chart automatically.
Configuring Parameter Display#
To show or hide parameters from the chart, perform the following actions:
-
Open the well data window for the desired well. For details, see Well Data Window.
-
In the central part of the window, click the name of the currently selected template at the top of the trend chart, and then, select the desired template from the drop-down list.
-
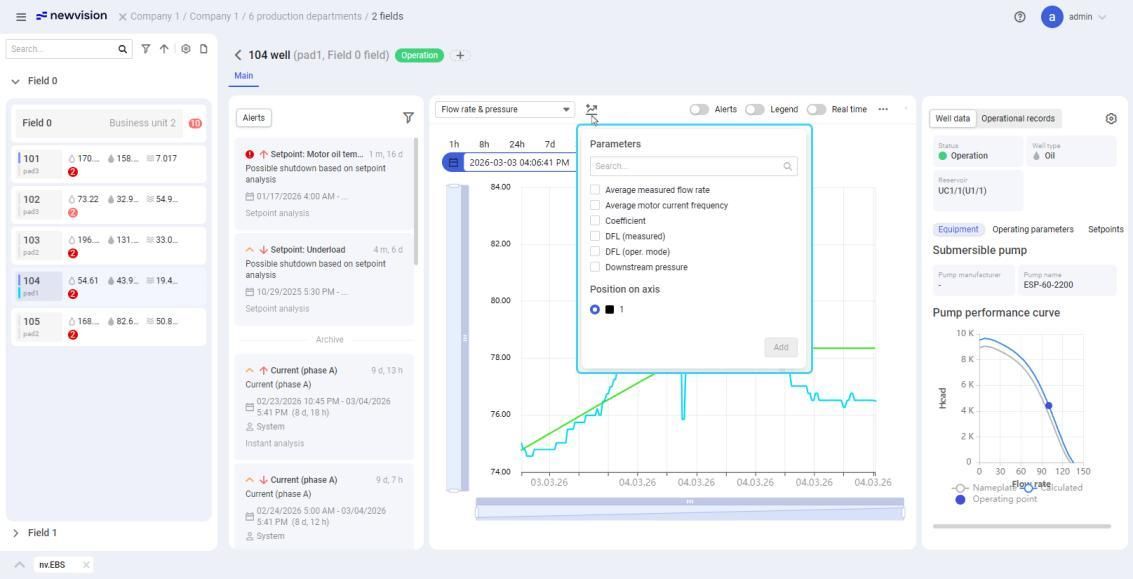
To the right of the template list, click Add parameters (
 ), and then, in the drop- down list, select or clear check boxes of the desired parameters.
 Select image to enlarge
 -
At the top of the chart, click Save (
), and then select one of the following options from the drop-down list:-
To save changes to the currently selected template, select Save.
Important
Default templates (Flow rate & pressure and Current frequency) cannot be edited. You can only save changes to a new template (see below).
-
To save changes to a new template, select Save as new.
-
Deleting Templates#
To delete a template, perform the following actions:
-
Open the well data window for the desired well. For details, see Well Data Window.
-
In the central part of the window, click the name of the currently selected template at the top of the trend chart, hover over the desired template and click Delete (
) to the right of the template name.Important
Default templates (Flow rate & pressure and Current frequency) cannot be deleted.
-
In the window that opens, confirm the deletion.