After a project is created, imported, or opened, you can create well design cases (versions) within it.
By default, all new projects contain a default case pre-filled with well, fluid and reservoir data. You can modify it to match your conditions and select the appropriate equipment.
You can add more cases by them, existing ones, or from JSON files stored locally.
Creating New Cases
To create a new case from scratch, perform the following actions:
- Open the nv.design module.
For details on navigation in the system, see System Interface. In the pane located in the left part of the module, in the Cases area, click Add ( ), and then select Create new ( ) from the drop-down menu.

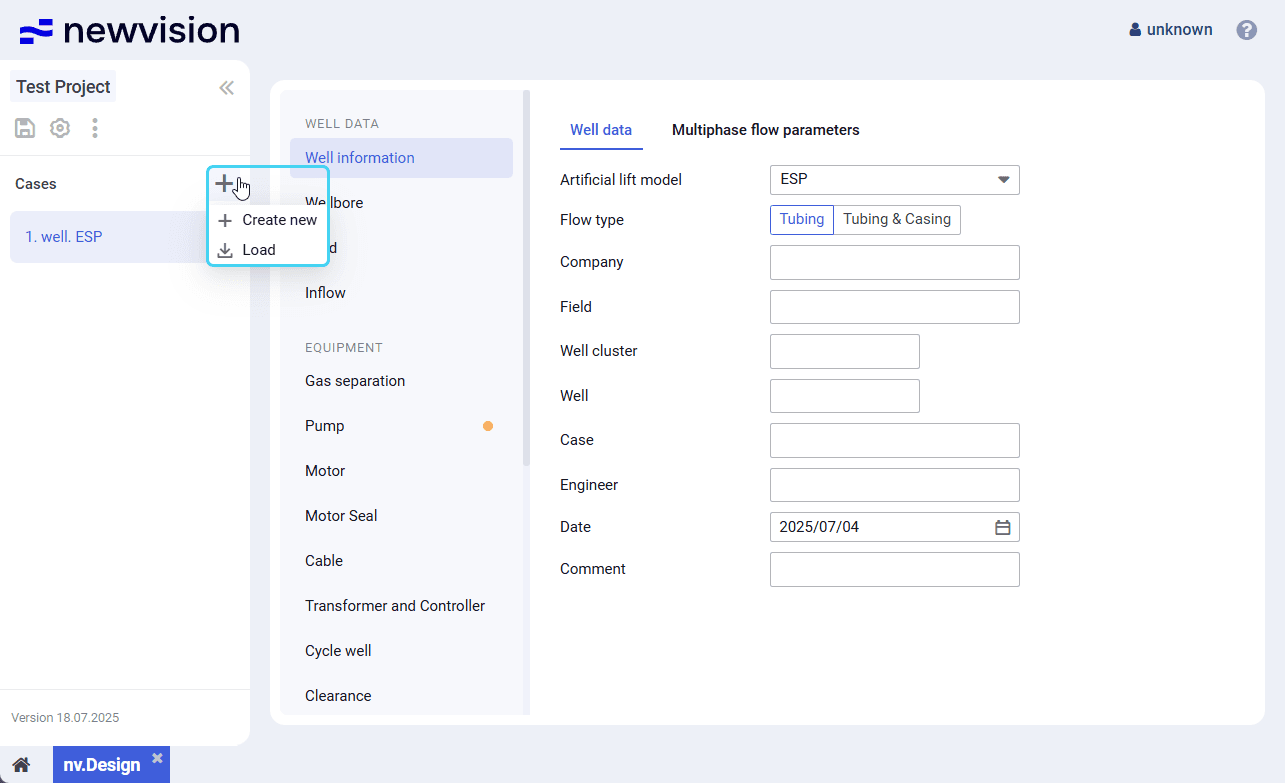
- In the window that appears, enter a name for the new case.
- Proceed to configuring the well design parameters in the module sections. For details, see .
After the configuration is completed, in the left part of the module, click Save ( ) under the name of the current project.

Copying Existing Cases
To create a new case by copying an existing one, perform the following actions:
- Open the nv.design module.
For details on navigation in the system, see System Interface. In the pane located in the left part of the module, in the Cases area, hover over the name of the case that you want to copy, and then, in the right part of the row, click the three dots icon ( ) and select Duplicate ( ) from the drop-down menu.


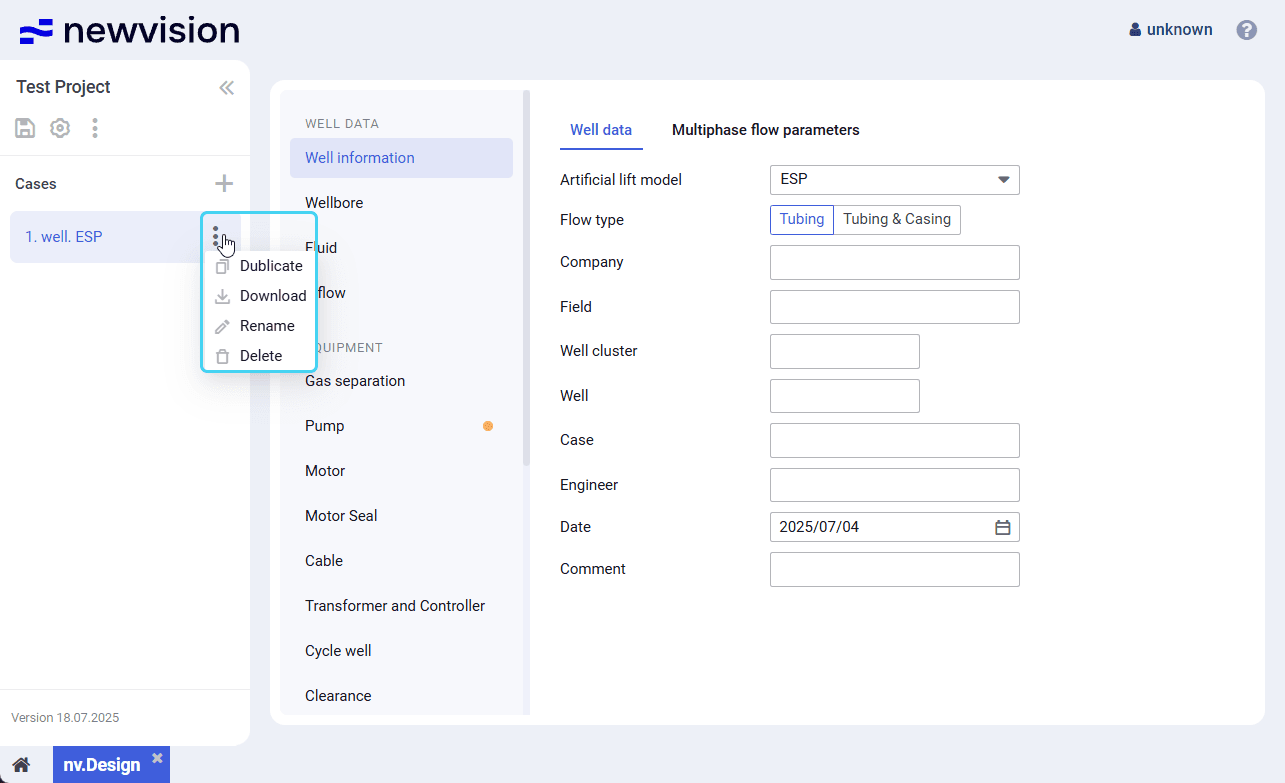
- A copy of the selected case appears in the list.
- (Optional) To rename the copied case, perform the following actions:
Hover over the created case and click the three dots icon ( ).
From the drop-down menu, select Rename ( ).

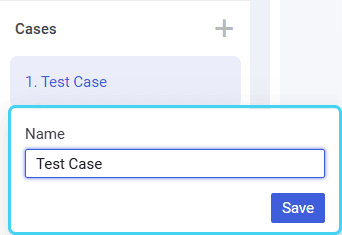
- In the window that appears, enter a new name for the case and click Save.
 | Note |
- Proceed to configuring the well design parameters in the module sections. For details, see .
After the configuration is completed, in the left part of the module, click Save ( ) under the name of the current project.
Importing Cases
To import a case from a file in the JSON format stored locally, perform the following actions:
- Open the nv.design module.
For details on navigation in the system, see System Interface. In the pane located in the left part of the module, in the Cases area, click Add ( ), and then select Load ( ) from the drop-down menu.
- In the file explorer window, select the JSON file with the project you want to import.
The imported case appears in the list. - (Optional) To rename the copied case, perform the following actions:
Hover over the created case and click the three dots icon ( ).
From the drop-down menu, select Rename ( ).
- In the window that appears, enter a new name for the case and click Save.
| Note |
- Proceed to configuring the well design parameters in the module sections. For details, see .
After the configuration is completed, in the left part of the module, click Save ( ) under the name of the current project.